Tutorials in English and Thai with written-out steps below the videos, and more pictures of this look and products used (both for this tutorial and base makeup in the photos) below that! Enjoy <3 xo !!!
English version
 Thai version
 Steps:
1) Prep: apply eyeshadow base/primer
2) Apply cream-colored or skin-like-color eyeshadow all over eye area up to brow brown
3) Apply light-brown eyeshadow to lids and lash line, then blend to diffuse edges
4) Apply medium-brown eyeshadow to the outer half of lids, and the outer half or lash line, and blend. (If you have a defined crease, apply this color there as well)
5) Apply bronze-brown eyeshadow with a shimmery finish on outer half of lids and outer half of lash line. Different eyeshadow finishes add dimension to the eyes.
6) To make eyes pop apply shimmery finish to the middle of lids to bring attention to the eyes. (in this case, I mixed M.A.C antique with Amber lights).
7) To make eyes more golden add true-gold eyeshadow color to inner half of lids.
8) To open up the eyes (give them a bright-eyed and fresh-look appearance) add pinky-beige shimmery eyeshadow to the tear duct areas of your eyes
9) To smoke out the look even more add dark-brown or black eyeshadow with a matte finish to the corner of your eyes, and blend.
10) Apply eyeliner as closely to lash line as possible, and lift the line at the end to give your eyes a lift and a little feline look
11) Curl lashes with three clamps: once at the roots of lashes, the second time at the middle, and the third time towards the end of your lashes to give them a nice curl while avoid making any obvious kink
12) Apply mascara, focusing at the outer half of your lashes to give it a fluttery effect and give your eyes a more feline shape.
Key to smokey eyes:
1) Blend
2) Blend Blend
3) Blendddddd....... <3 ;)
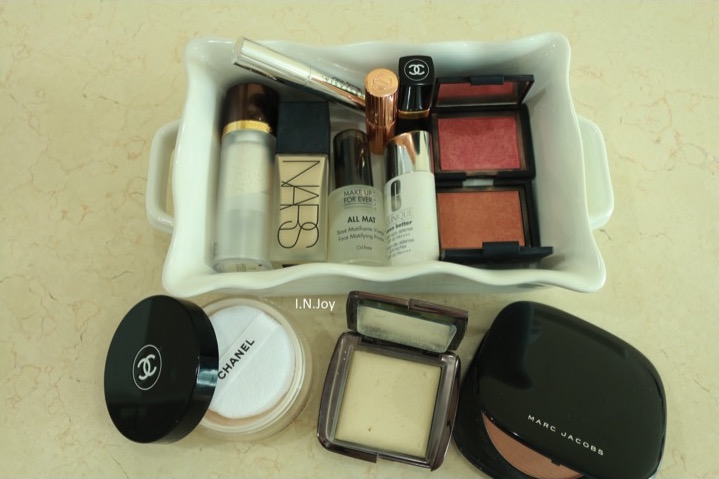
Base/face makeup products used:
Tom Ford Illuminating Primer
Nars All day luminous weightless foundation
Make Up For Ever All Mat Primer
Clinique Even Better Dark Spot Defense
Nars blush (Organsm, Lustre)
Anastasia Beverly Hills Clear Brow Gel
Chanel Natural Loose setting powder (Clair 20)
Chanel Rouge Coco Lipstick #48 Sentiment
Marc Jacobs O! Mega Bronzer
Charlotte Tilbury Matte Revolution Lipstick (Very Victoria)
Hourglass Ambient Lighting Powder (Diffused Light)
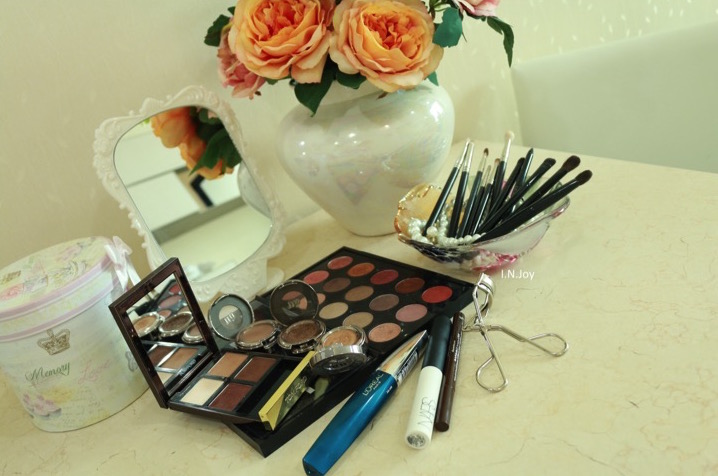
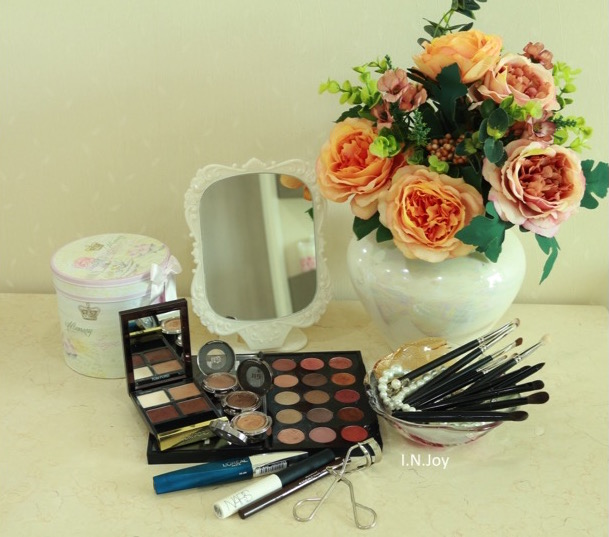
 Makeup products (eyes) used in this tutorial:
MAC eyeshadows (All That Glitters, Amber Lights, Antique, Charcoal Brown)
Urban Decay Eyeshadows (Half-baked, Smog)
Tom Ford Eyeshadow Quad (Cocoa Mirage)
Shue Uemura Eyelash Curler
Nars Smudge Proof Eyeshadow Base
Stila Stay-All-Day Waterproof eyeliner (Dark Brown)
L’Oreal Lash Architect 4D waterproof mascara
MAC Brushes (239, 217, 219, 228)
Suqqu Eyeshadow brushes (L, F)
Chikuhodo Z-series eyeshadow brushes (Z-5 and Z-10)
Hakuhodo Pencil brush G5515BkSL
Hakuhodo Blending Brush J5529


See you again soon!!!! <3 xoxo
Disclaimer: I can't guarantee that the products mentioned here will suit you because everyone's skin is different hence the difference in toleration and reaction to these products. I am reviewing these products based on my experience

xo
ข้อควรระวัง: เครื่องสำอางค์ที่กล่าวถึงในนี้มาจากประสบการณ์ส่วนตัวที่ทดลองใช้เพื่อเป็นการกรองข้อมูลระดับหนึ่งในการเลือกใช้ผลิตภัณฑ์ แต่การแพ้ การระคายเคืองหรือการอุดตันนั้นเป็นปัจจัยที่เกิดขึ้นแตกต่างกันในแต่ละบุคคล โปรดเลือกใช้ตามความเหมาะสมของสภาพผิว

xo


Tutorial Bronzy-Golden Smokey Eyes: วิธีการ แต่งตา Bronzy-Golden Smokey Eyes
English version
Thai version
Steps:
1) Prep: apply eyeshadow base/primer
2) Apply cream-colored or skin-like-color eyeshadow all over eye area up to brow brown
3) Apply light-brown eyeshadow to lids and lash line, then blend to diffuse edges
4) Apply medium-brown eyeshadow to the outer half of lids, and the outer half or lash line, and blend. (If you have a defined crease, apply this color there as well)
5) Apply bronze-brown eyeshadow with a shimmery finish on outer half of lids and outer half of lash line. Different eyeshadow finishes add dimension to the eyes.
6) To make eyes pop apply shimmery finish to the middle of lids to bring attention to the eyes. (in this case, I mixed M.A.C antique with Amber lights).
7) To make eyes more golden add true-gold eyeshadow color to inner half of lids.
8) To open up the eyes (give them a bright-eyed and fresh-look appearance) add pinky-beige shimmery eyeshadow to the tear duct areas of your eyes
9) To smoke out the look even more add dark-brown or black eyeshadow with a matte finish to the corner of your eyes, and blend.
10) Apply eyeliner as closely to lash line as possible, and lift the line at the end to give your eyes a lift and a little feline look
11) Curl lashes with three clamps: once at the roots of lashes, the second time at the middle, and the third time towards the end of your lashes to give them a nice curl while avoid making any obvious kink
12) Apply mascara, focusing at the outer half of your lashes to give it a fluttery effect and give your eyes a more feline shape.
Key to smokey eyes:
1) Blend
2) Blend Blend
3) Blendddddd....... <3 ;)
Base/face makeup products used:
Tom Ford Illuminating Primer
Nars All day luminous weightless foundation
Make Up For Ever All Mat Primer
Clinique Even Better Dark Spot Defense
Nars blush (Organsm, Lustre)
Anastasia Beverly Hills Clear Brow Gel
Chanel Natural Loose setting powder (Clair 20)
Chanel Rouge Coco Lipstick #48 Sentiment
Marc Jacobs O! Mega Bronzer
Charlotte Tilbury Matte Revolution Lipstick (Very Victoria)
Hourglass Ambient Lighting Powder (Diffused Light)
Makeup products (eyes) used in this tutorial:
MAC eyeshadows (All That Glitters, Amber Lights, Antique, Charcoal Brown)
Urban Decay Eyeshadows (Half-baked, Smog)
Tom Ford Eyeshadow Quad (Cocoa Mirage)
Shue Uemura Eyelash Curler
Nars Smudge Proof Eyeshadow Base
Stila Stay-All-Day Waterproof eyeliner (Dark Brown)
L’Oreal Lash Architect 4D waterproof mascara
MAC Brushes (239, 217, 219, 228)
Suqqu Eyeshadow brushes (L, F)
Chikuhodo Z-series eyeshadow brushes (Z-5 and Z-10)
Hakuhodo Pencil brush G5515BkSL
Hakuhodo Blending Brush J5529
See you again soon!!!! <3 xoxo
Disclaimer: I can't guarantee that the products mentioned here will suit you because everyone's skin is different hence the difference in toleration and reaction to these products. I am reviewing these products based on my experience
ข้อควรระวัง: เครื่องสำอางค์ที่กล่าวถึงในนี้มาจากประสบการณ์ส่วนตัวที่ทดลองใช้เพื่อเป็นการกรองข้อมูลระดับหนึ่งในการเลือกใช้ผลิตภัณฑ์ แต่การแพ้ การระคายเคืองหรือการอุดตันนั้นเป็นปัจจัยที่เกิดขึ้นแตกต่างกันในแต่ละบุคคล โปรดเลือกใช้ตามความเหมาะสมของสภาพผิว